Practical Malware Analysis - Anti-VM
Chapter 17 of the book covers anti-VM techniques: methods malware uses to detect whether it is running inside a virtual machine and, upon detection, alter its behavior (typically by self-deleting or terminating) to hinder analysis. The two labs below present real-world examples of these techniques in action.
Lab 17-01
Analyze the malware Lab17-01.exe inside a VM. It is the same sample as Lab07-01.exe, but now with added anti-VMware techniques.
Book Note: The anti-VM techniques found in this lab might not work in your environment—it depends on which hypervisor you are using (VMware, VirtualBox, etc.), as most of these checks specifically target VMware signatures.
Question 1
1 | What anti-VM techniques does the malware use? |
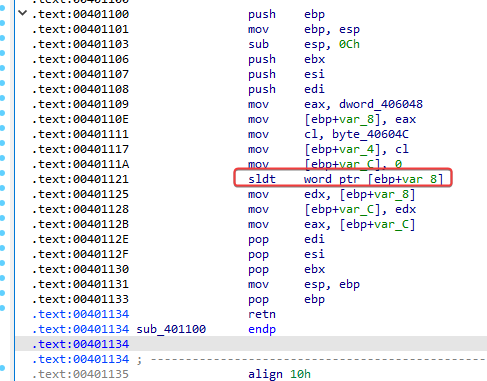
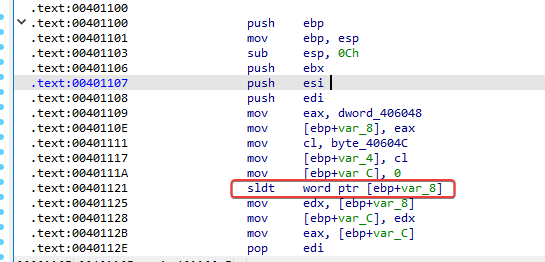
The malware uses 3 “vulnerable” x86 instructions—instructions that are not privileged and can therefore be executed directly from user mode to query internal processor structures that behave differently inside a VM. They are:
| Address | Instruction | Technique |
|---|---|---|
0x00401121 |
sldt |
No Pill |
0x004011B5 |
sidt |
Red Pill |
0x00401204 |
str |
Task Register check |
Question 2
1 | Running the `findAntiVM.py` script from Chapter 17 |
(This question depends on the commercial version of IDA Pro—since I don’t have access to it at the moment, I am leaving this open to review later.)
Question 3
1 | What happens when each anti-VM technique succeeds? |
sidt — Red Pill Technique
The SIDT instruction executes at 0x4011B5 only if a mutex named HGL345 does not exist on the system—meaning this check is the first step in a chain of verifications.
How it works, step-by-step:
SIDTcaptures the entire IDT (Interrupt Descriptor Table)—a 6-byte structure.- The malware takes the 2 least significant bytes of it, using an offset of
0x2. - To reach offset
0x5—where the byte revealing VMware (the value0xFF) is located—the code shifts 18 bits (0x12) to the right. Since each byte consists of 8 bits, this is equivalent to moving 3 additional bytes from the current position, landing exactly on offset0x5. - This final byte is compared against
0xFF—if they match, the VM has been detected.
💡 This is the Red Pill technique discussed in the chapter’s theory: the value of the 5th byte of the IDT is typically
0xFFwhen the VM relocates this table, something that does not occur on physical hardware.
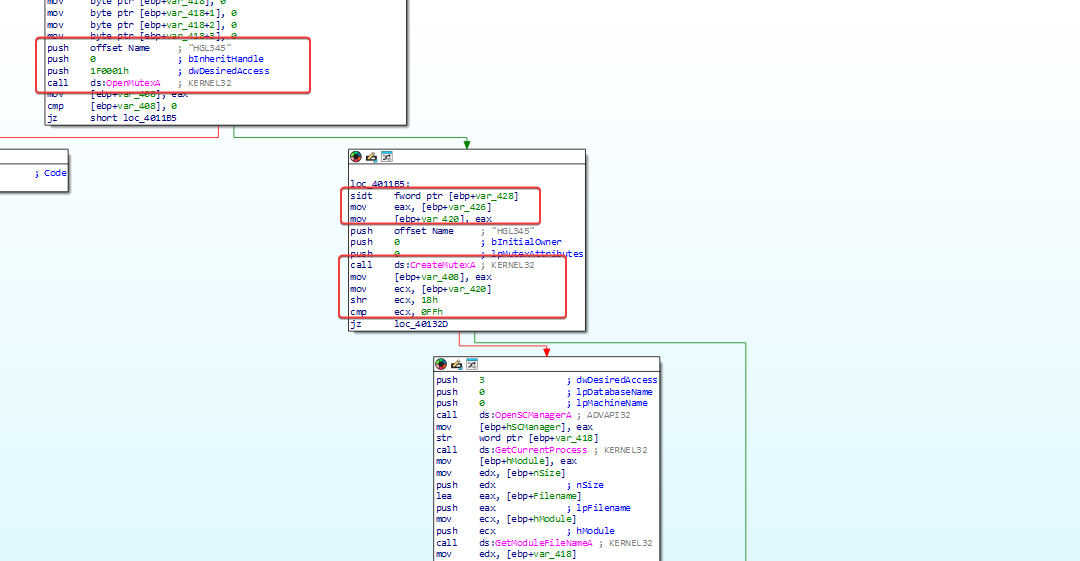
If this check succeeds (i.e., detects the VM), the code calls sub_401000—the routine responsible for the malware deleting itself. 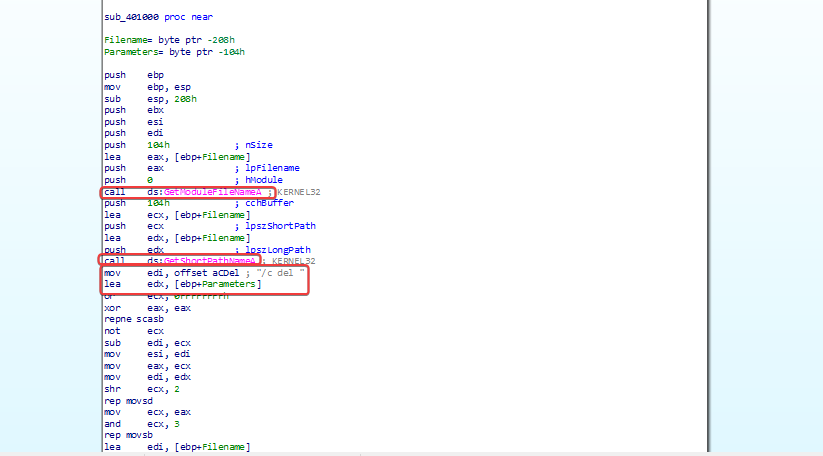
str — Check via Task Register
The STR instruction executes at 0x401204 only if the previous check (sidt) has already passed—meaning it is the second step in the chain.
How it works:
STRretrieves the Task State Segment (TSS) and stores the result invar_418.- The code checks if the first byte returned is
0. - If it is, it performs a second check, comparing the second byte with
0x40.
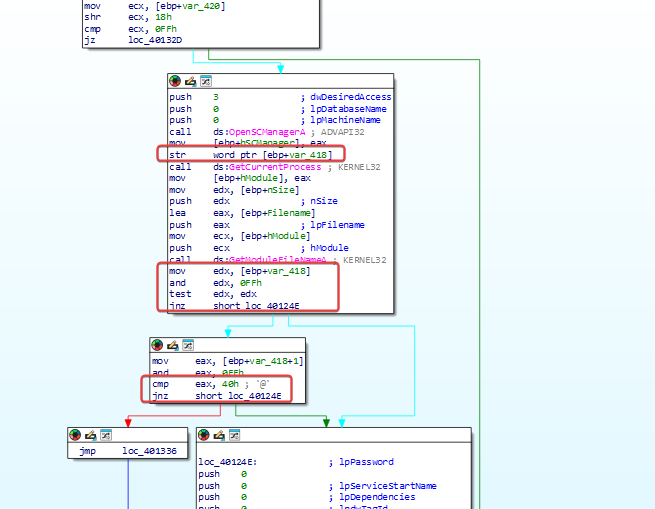
When this check also succeeds, the execution flow reaches loc_401336, which inevitably calls sub_401000 again—reinforcing the self-deletion mechanism.
sldt — No-Pill Technique
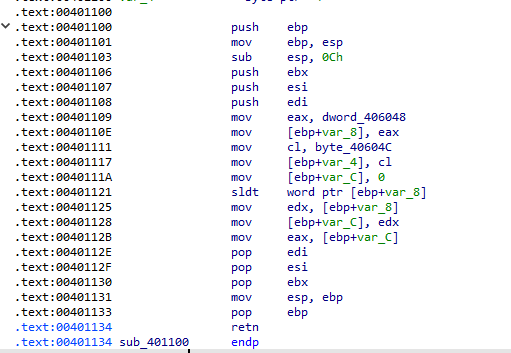
The SLDT instruction executes at 0x401121 only if the preceding checks have passed. It is stored at a different offset than the others because this specific check occurs within a separate subroutine, sub_401100—called at 0x4012D1, after the malware has already created the malicious service.
Analyzing sub_401100:
- The value
0x0DDCCBBAAis assigned toEAXand stored at[ebp+var_8]—this value serves only as an initialization step and never appears again. - The
SLDToperation executes, and the result is stored in that same memory location. - This result is then moved to
[ebp+var_C]and subsequently back toEAX, which is the value returned by this subroutine.

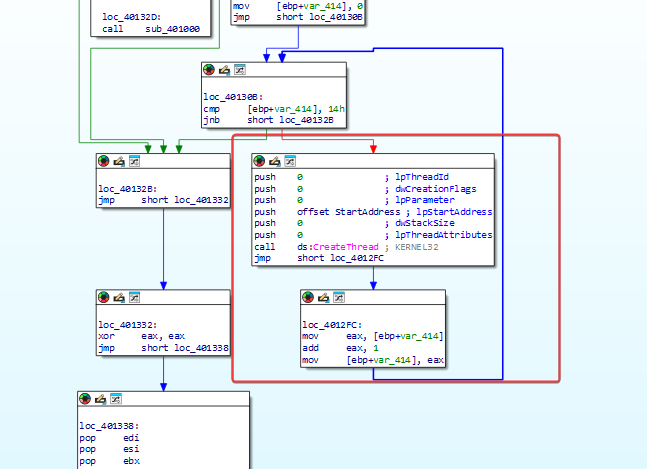
Returning to the caller of sub_401100: the return value is compared against 0x0DDCC0000.
- If they do not match, a jump occurs, causing the malware to terminate execution. - If it triggers (indicating a VM), the code enters an infinite loop, repeatedly creating a new thread with the same
StartAddress—the same denial-of-service behavior (resource exhaustion) observed when runningLab07-01.exewithout these protections.
Question 4
1 | Which of these techniques work against your VM? |
The values compared by the malware are largely specific VMware signatures—since I am running the analysis in VirtualBox, many of these checks do not directly apply to my environment (the reference values the malware expects to find belong to a different hypervisor).
Question 5
1 | Why does each technique work or fail? |
(To be reviewed in greater detail—this depends on comparing, instruction by instruction, the actual values returned by VirtualBox against the values the malware expects from VMware.)
Question 6
1 | How can you disable these techniques and make the malware run normally? |
The simplest way is to “NOP out” the instructions associated with the checks (sidt, str, sldt), ensuring that only the jumps necessary for normal execution flow are taken—or, alternatively, modifying the jump flags directly in a debugger to force the path that does not lead to detection.
Lab 17-02
Analyze the malware Lab17-02.dll inside a VM. After answering the first question, the exercise asks you to run the installation exports via rundll32.exe and monitor the process using a tool like Process Monitor:
rundll32.exe Lab17-02.dll,InstallRT (or InstallSA/InstallSB)
Question 1
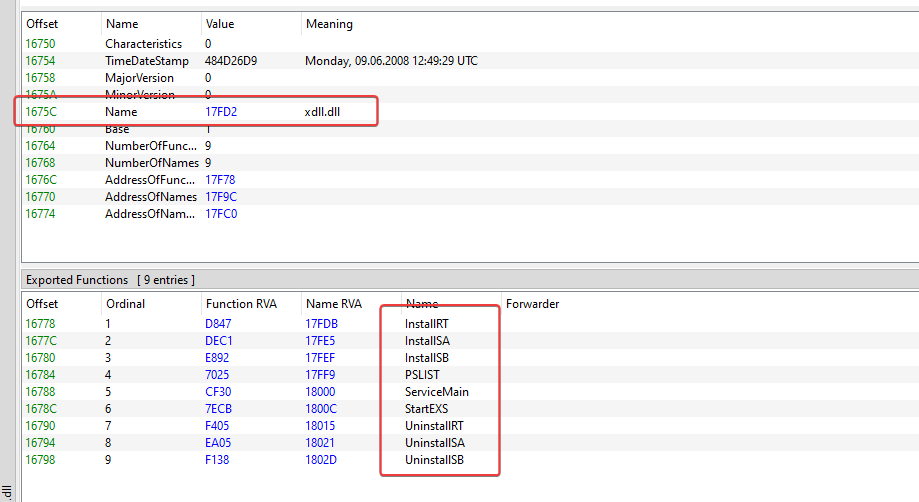
1 | What are the exports of this DLL? |
I was unable to access VMware for this lab—I will try to answer as many of the other questions as possible based on the observed behavior.
In addition to the exports listed below, it is evident that the malware imports a large number of functions from various libraries.
Question 2
1 | What happens after the installation attempt via `rundll32.exe`? |
Running in PowerShell:
1 | rundll32.exe Lab17-02.dll,InstallRT |
Apparently, nothing happens on the screen — so I proceeded to analyze it using Process Monitor.
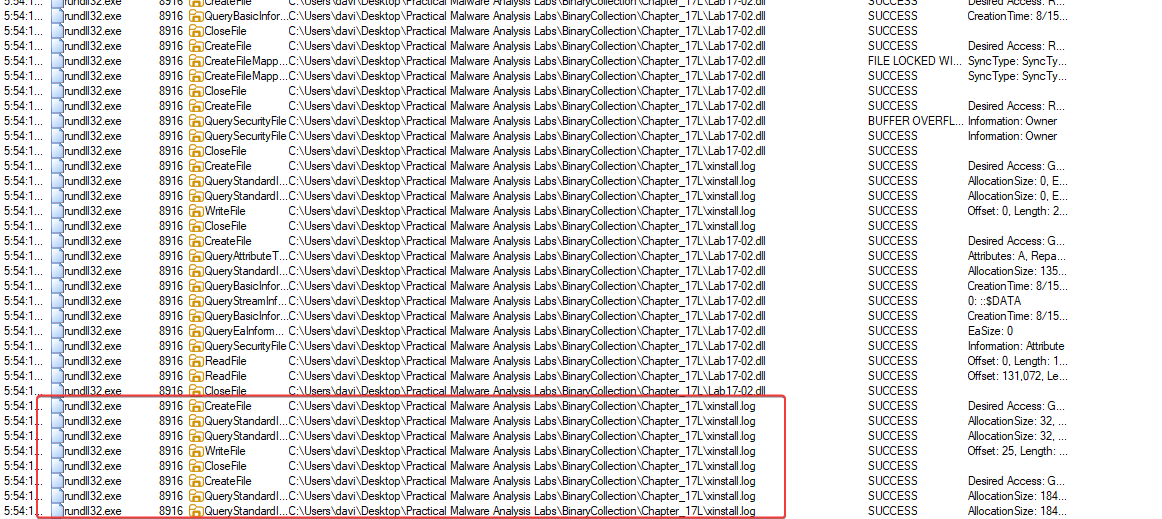
A log file is created, and within it, one can see that the malware attempts process injection into iexplore.exe — but the attempt fails because that process is not found on the system (I do not have Internet Explorer installed in the test environment).
Question 3
1 | Which files are created and what do they contain? |
A .bat file containing self-deletion code is created, along with a file named xinstall.log containing the string: Found Virtual Machine, Install Cancel.